Today, we are going to walk through how to self-host Convex on AWS with SST. This guide will get a local Convex instance running as well as deployed to AWS via SST. We will be following the Convex Self-Hosted guide.
Edit: I have since created another guide using EC2. You can find it here.
Prerequisites
- Node.js and npm/pnpm/bun installed
- Basic familiarity with SST and Convex
- An AWS account
Preamble
I just want to point out that this is not a definitive guide. This was me trying to get Convex Self-Hosted working on AWS with SST, with the components I am used to using. However, the current Convex Self-Hosted guide only provides explicit guides for Railway.com and Fly.io, and I believe that general docker-compose.yml setup is intended to be used on a long-lived server like EC2. I am not used to using EC2, so please take this guide with a grain of salt. I will be using ECS with Fargate as that is what the SST Service component gives me.
I know using the Convex Cloud service is the much easier and recommended way to get started, and has more features, especially if you deploy to Vercel or Netlify. However, I have AWS credits and wanted to save on the monthly costs while building a project. This is a flaw of mine, but also allows me to learn things the hard way, even if it is not the best way.
Project Setup
Let’s start by creating a new SST project. This will create a new SST project with a basic Vite React app:
# Initialize the projectbun create vite@latest convex-self-hosted --template react-tscd convex-self-hosted
# Setup SSTbunx sst init
# Install dependenciesbun installbun sst installConvex Setup
Let’s install the dependencies for Convex:
bun add convexInitial SST Setup
/// <reference path="./.sst/platform/config.d.ts" />
export default $config({ app(input) { return { name: "convex-self-hosted", removal: input?.stage === "production" ? "retain" : "remove", protect: ["production"].includes(input?.stage), home: "aws", providers: { aws: { region: "us-east-1", // set to your desired region profile: "<YOUR_AWS_PROFILE>", // set to your desired AWS profile }, }, }; }, async run() {},});What does Convex need?
Looking at the Convex Self-Hosted guide, we can see a reference to a docker-compose.yml file. The Convex team has provided a great starting point to run Convex locally. It lists a ton of environment variables which tells us what we can use. You can find the file here.
TLDR:
- A way to run the Convex backend service
- A way to run the Convex dashboard service
MYSQL_URLorPOSTGRES_URLwithout the database name- 5 buckets:
S3_STORAGE_EXPORTS_BUCKETS3_STORAGE_SNAPSHOT_IMPORTS_BUCKETS3_STORAGE_MODULES_BUCKETS3_STORAGE_FILES_BUCKETS3_STORAGE_SEARCH_BUCKET
So we will use the following AWS resources:
- A VPC
- An ECS Cluster
- A MySQL RDS instance
- 5 S3 buckets
- An ECS Service to run the Convex backend with load balancer to handle the WebSocket connections
- An ECS Service to run the Convex dashboard with API Gateway
- A static React site that we will use to demo Convex working
Back to SST
Let’s add the resources to our SST project. This code is all inside the async run() function in the sst.config.ts file.
const vpc = new sst.aws.Vpc("Vpc"); // you can add a `bastion` if you wantconst cluster = new sst.aws.Cluster("Cluster", { vpc,});
const database = new sst.aws.Mysql("Database", { vpc, database: "convex_self_hosted", dev: { database: "convex_self_hosted", host: "localhost", port: 3306, username: "root", password: "root", },});Local MySQL Setup
Before starting SST we need to have a local MySQL instance running. We can do this by using the docker-compose.yml file below.
services: mysql: image: mysql:8.0 ports: - "3306:3306" environment: - MYSQL_ROOT_PASSWORD=root - MYSQL_DATABASE=convex_self_hosted volumes: - mysql-data:/var/lib/mysql
volumes: mysql-data:Running this will start a MySQL instance on your local machine.
docker compose up -dNow when we run bun sst dev it will use our local MySQL instance.
S3 Buckets
Now we need to add the S3 buckets to our SST project. Add the following to the async run() function in the sst.config.ts file after the database.
const exportsBucket = new sst.aws.Bucket("ExportsBucket", {});const snapshotImportsBucket = new sst.aws.Bucket("SnapshotImportsBucket", {});const modulesBucket = new sst.aws.Bucket("ModulesBucket", {});const filesBucket = new sst.aws.Bucket("FilesBucket", {});const searchBucket = new sst.aws.Bucket("SearchBucket", {});Now that we have the things Convex needs to start up we can add in the services. Please note that we are setting up just the local services right now. This is why some of the values are hardcoded as 127.0.0.1 and the MYSQL_URL is pointing to the local MySQL instance only.
// ... buckets above ...const convex = new sst.aws.Service("Convex", { cluster, image: "ghcr.io/get-convex/convex-backend:5143fec81f146ca67495c12c6b7a15c5802c37e2", cpu: "1 vCPU", memory: "2 GB", scaling: { min: 1, max: 1, }, link: [ database, exportsBucket, snapshotImportsBucket, modulesBucket, filesBucket, searchBucket, ], environment: { S3_STORAGE_EXPORTS_BUCKET: exportsBucket.name, S3_STORAGE_SNAPSHOT_IMPORTS_BUCKET: snapshotImportsBucket.name, S3_STORAGE_MODULES_BUCKET: modulesBucket.name, S3_STORAGE_FILES_BUCKET: filesBucket.name, S3_STORAGE_SEARCH_BUCKET: searchBucket.name, MYSQL_URL: $interpolate`mysql://${database.username}:${database.password}@host.docker.internal:${database.port}`, CONVEX_CLOUD_ORIGIN: "http://127.0.0.1:3210", CONVEX_SITE_ORIGIN: "http://127.0.0.1:3211", REDACT_LOGS_TO_CLIENT: "true", DO_NOT_REQUIRE_SSL: "true", DISABLE_BEACON: "true", }, dev: { url: "http://127.0.0.1:3210", command: "bun run scripts/docker-backend.ts", },});
const dashboard = new sst.aws.Service("Dashboard", { cluster, image: "ghcr.io/get-convex/convex-dashboard:5143fec81f146ca67495c12c6b7a15c5802c37e2", environment: { NEXT_PUBLIC_DEPLOYMENT_URL: "http://127.0.0.1:3210", }, link: [convex], dev: { url: "http://127.0.0.1:6791", command: "bun run scripts/docker-dashboard.ts", }, cpu: "0.25 vCPU", memory: "0.5 GB",});Let’s break down what we just did before we move on.
First, we created a sst.aws.Service for the Convex backend. We set the image to the one from the Convex Self-Hosted guide. We also set scaling to a minimum of 1 and maximum of 1. This is because at the moment Convex is not able to horizontally scale. Therefore, we can set the cpu and memory to 1 vCPU and 2GB of memory respectively to start with.
We also set the link to include the database, and all 4 buckets. This will ensure that SST will add the necessary IAM permissions for the Convex service to access the buckets and database.
We are not able to use the built-in Resource from SST to reference the resources, so we will set them as environment variables. You can see that with the bucket names. The MYSQL_URL is a bit more special. It is using the $interpolate function to interpolate the database username, password, and port into the URL. The URL cannot contain the database name, and we use the host.docker.internal to connect to the local MySQL instance locally.
Lastly we set the dev property to start the Convex backend service locally. However, as we need access to the SST AWS resources we somehow have to start the docker container with the needed environment variables. To do this I came up with the following script:
import { spawnSync } from "bun";
const CONTAINER_NAME = "convex-backend";
function stopContainer() { console.log(`Stopping container: ${CONTAINER_NAME}`); spawnSync(["docker", "stop", CONTAINER_NAME], { stdio: ["inherit", "inherit", "inherit"], env: process.env, });}
process.on("SIGTERM", () => { stopContainer(); process.exit(0);});
// Docker run command equivalent to the backend service in docker-compose.ymlconst env = { INSTANCE_NAME: process.env.INSTANCE_NAME ?? "", INSTANCE_SECRET: process.env.INSTANCE_SECRET ?? "", CONVEX_RELEASE_VERSION_DEV: process.env.CONVEX_RELEASE_VERSION_DEV ?? "", ACTIONS_USER_TIMEOUT_SECS: process.env.ACTIONS_USER_TIMEOUT_SECS ?? "", CONVEX_CLOUD_ORIGIN: process.env.CONVEX_CLOUD_ORIGIN ?? `http://127.0.0.1:${process.env.PORT ?? 3210}`, CONVEX_SITE_ORIGIN: process.env.CONVEX_SITE_ORIGIN ?? `http://127.0.0.1:${process.env.SITE_PROXY_PORT ?? 3211}`, DATABASE_URL: process.env.DATABASE_URL ?? "", DISABLE_BEACON: process.env.DISABLE_BEACON ?? "", REDACT_LOGS_TO_CLIENT: process.env.REDACT_LOGS_TO_CLIENT ?? "", DO_NOT_REQUIRE_SSL: process.env.DO_NOT_REQUIRE_SSL ?? "", POSTGRES_URL: process.env.POSTGRES_URL ?? "", MYSQL_URL: process.env.MYSQL_URL ?? "", RUST_LOG: process.env.RUST_LOG ?? "info", RUST_BACKTRACE: process.env.RUST_BACKTRACE ?? "", AWS_REGION: process.env.AWS_REGION ?? "", AWS_ACCESS_KEY_ID: process.env.AWS_ACCESS_KEY_ID ?? "", AWS_SECRET_ACCESS_KEY: process.env.AWS_SECRET_ACCESS_KEY ?? "", AWS_SESSION_TOKEN: process.env.AWS_SESSION_TOKEN ?? "", S3_STORAGE_EXPORTS_BUCKET: process.env.S3_STORAGE_EXPORTS_BUCKET ?? "", S3_STORAGE_SNAPSHOT_IMPORTS_BUCKET: process.env.S3_STORAGE_SNAPSHOT_IMPORTS_BUCKET ?? "", S3_STORAGE_MODULES_BUCKET: process.env.S3_STORAGE_MODULES_BUCKET ?? "", S3_STORAGE_FILES_BUCKET: process.env.S3_STORAGE_FILES_BUCKET ?? "", S3_STORAGE_SEARCH_BUCKET: process.env.S3_STORAGE_SEARCH_BUCKET ?? "", S3_ENDPOINT_URL: process.env.S3_ENDPOINT_URL ?? "",};
const ports = [ `${process.env.PORT ?? 3210}:3210`, `${process.env.SITE_PROXY_PORT ?? 3211}:3211`,];
const volumes = ["convex-data:/convex/data"];
const args = [ "run", "--rm", "-it", ...ports.flatMap((p) => ["-p", p]), ...volumes.flatMap((v) => ["-v", v]), ...Object.entries(env) .filter(([_, v]) => !!v) .flatMap(([k, v]) => ["-e", `${k}=${v}`]), "--stop-signal", "SIGINT", "--stop-timeout", "10", "--health-cmd", "curl -f http://localhost:3210/version", "--health-interval", "5s", "--health-start-period", "10s", "--name", CONTAINER_NAME, "ghcr.io/get-convex/convex-backend:5143fec81f146ca67495c12c6b7a15c5802c37e2",];
spawnSync(["docker", ...args], { stdio: ["inherit", "inherit", "inherit"], env: process.env,});The long and short of it is I took the Convex docker-compose.yml version and converted it to a docker run command, giving it the same environment variables, ports, and volumes. We use spawnSync to run the command and stdio: ["inherit", "inherit", "inherit"] to inherit the stdout, stderr, and stdin from the parent process.
However, one issue this comes with is that the container is left running when we stop the SST dev environment. To fix this we can use the process.on("SIGTERM", () => { ... }) to stop the container when the process is terminated.
Dashboard
The dashboard service is pretty much the same but simpler. We have a sst.aws.Service for the dashboard and a docker-dashboard.ts script that is pretty much the same as the docker-backend.ts script.
import { spawnSync } from "bun";
const CONTAINER_NAME = "convex-dashboard";
function stopContainer() { console.log(`Stopping container: ${CONTAINER_NAME}`); spawnSync(["docker", "stop", CONTAINER_NAME], { stdio: ["inherit", "inherit", "inherit"], env: process.env, });}
process.on("SIGTERM", () => { console.log("SIGTERM received"); stopContainer(); process.exit(0);});process.on("exit", () => { console.log("exit received"); stopContainer();});
spawnSync( [ "docker", "run", "--rm", "-it", "-p", "6791:6791", "-e", "NEXT_PUBLIC_DEPLOYMENT_URL=http://127.0.0.1:3210", "--name", CONTAINER_NAME, "--stop-signal", "SIGINT", "--stop-timeout", "10", "ghcr.io/get-convex/convex-dashboard:5143fec81f146ca67495c12c6b7a15c5802c37e2", ], { stdio: ["inherit", "inherit", "inherit"], env: process.env, });Why the process.on("exit", () => { ... })? Well, sometimes the container is left running so this helps ensure we stop it.
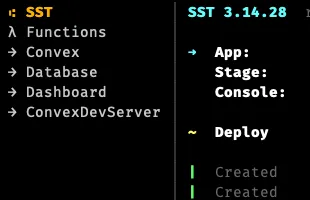
Start Dev Environment?
Yes, we can start the SST dev environment and have it start the Convex backend and dashboard services locally. Make sure the database is running with the docker-compose.yml file above.
To login to the Convex dashboard though we first need to generate a key as per the Convex Self-Hosted guide.
docker exec convex-backend ./generate_admin_key.shUse that key to login to the dashboard at http://127.0.0.1:6791.
Convex Dev
Convex needs a way to run the convex dev command. We can use the sst.x.DevCommand to run the convex dev command.
First update the .env.local file to include the following.
CONVEX_SELF_HOSTED_URL='http://127.0.0.1:3210'CONVEX_SELF_HOSTED_ADMIN_KEY='<your admin key>'Then add the following to the async run() function in the sst.config.ts file after the dashboard service.
// ... dashboard service above ...
const convexDev = new sst.x.DevCommand( "ConvexDevServer", { dev: { command: "bun run convex dev" } }, { dependsOn: [convex] });This will start the convex dev command and keep it running until we stop the SST dev environment.
Static Site for Demo
To see Convex in action let us use their tutorial app code. The code to bring over is the src/App.tsx, src/index.css, and src/main.tsx files.
Add Faker
bun add @faker-js/fakerApp.tsx
import { useEffect, useState } from "react";import { faker } from "@faker-js/faker";
// For demo purposes. In a real app, you'd have real user data.const NAME = getOrSetFakeName();
export default function App() { const messages = [ { _id: "1", user: "Alice", body: "Good morning!" }, { _id: "2", user: NAME, body: "Beautiful sunrise today" }, ]; // TODO: Add mutation hook here.
const [newMessageText, setNewMessageText] = useState("");
useEffect(() => { // Make sure scrollTo works on button click in Chrome setTimeout(() => { window.scrollTo({ top: document.body.scrollHeight, behavior: "smooth" }); }, 0); }, [messages]);
return ( <main className="chat"> <header> <h1>Convex Chat</h1> <p> Connected as <strong>{NAME}</strong> </p> </header> {messages?.map((message) => ( <article key={message._id} className={message.user === NAME ? "message-mine" : ""} > <div>{message.user}</div>
<p>{message.body}</p> </article> ))} <form onSubmit={async (e) => { e.preventDefault(); alert("Mutation not implemented yet"); setNewMessageText(""); }} > <input value={newMessageText} onChange={async (e) => { const text = e.target.value; setNewMessageText(text); }} placeholder="Write a message…" autoFocus /> <button type="submit" disabled={!newMessageText}> Send </button> </form> </main> );}
function getOrSetFakeName() { const NAME_KEY = "tutorial_name"; const name = sessionStorage.getItem(NAME_KEY); if (!name) { const newName = faker.person.firstName(); sessionStorage.setItem(NAME_KEY, newName); return newName; } return name;}index.css
Omitting the CSS in the blog post, but you can find it here.
main.tsx
import { StrictMode } from "react";import ReactDOM from "react-dom/client";import "./index.css";import App from "./App";import { ConvexProvider, ConvexReactClient } from "convex/react";
const convex = new ConvexReactClient(import.meta.env.VITE_CONVEX_URL);
ReactDOM.createRoot(document.getElementById("root")!).render( <StrictMode> <ConvexProvider client={convex}> <App /> </ConvexProvider> </StrictMode>);Add the Static Site Component to SST
We will use the sst.aws.StaticSite component to deploy the static site to AWS. Add the following to the async run() function in the sst.config.ts file after the dashboard service.
// ... dashboard service above ...
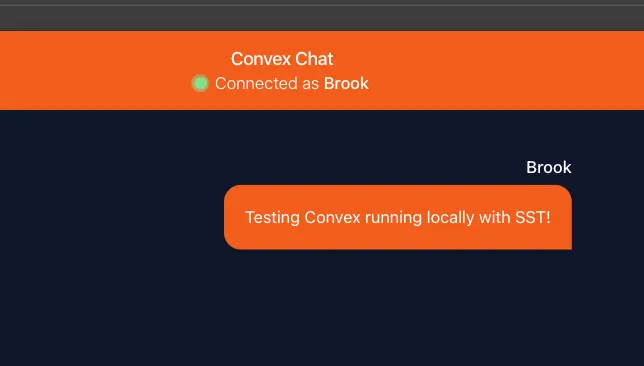
const site = new sst.aws.StaticSite("Site", { dev: { command: "bun run dev", url: "http://127.0.0.1:5173", }, environment: { VITE_CONVEX_URL: `http://127.0.0.1:3210`, },});After saving the file, SST will add it to the dev environment. And you will be able to see the site at http://127.0.0.1:5173. Note: this is only fake data. Just like the Convex tutorial.

Convex Tutorial
We can now follow the Convex tutorial. I’ll give a quick version of the code here just in case it ever changes.
Then add in the following to the convex/chat.ts file.
import { mutation, query } from "./_generated/server";import { v } from "convex/values";
export const sendMessage = mutation({ args: { user: v.string(), body: v.string(), }, handler: async (ctx, args) => { console.log("This TypeScript function is running on the server."); await ctx.db.insert("messages", { user: args.user, body: args.body, }); },});
export const getMessages = query({ args: {}, handler: async (ctx) => { const messages = await ctx.db.query("messages").order("desc").take(50); return messages.reverse(); },});Replace the initial src/App.tsx file with the following.
import { faker } from "@faker-js/faker";import { useEffect, useState } from "react";import { useMutation, useQuery } from "convex/react";import { api } from "../convex/_generated/api";
// For demo purposes. In a real app, you'd have real user data.const NAME = getOrSetFakeName();
export default function App() { const messages = useQuery(api.chat.getMessages); const sendMessage = useMutation(api.chat.sendMessage); // ... rest of the file same as before ...10 collapsed lines
const [newMessageText, setNewMessageText] = useState("");
useEffect(() => { // Make sure scrollTo works on button click in Chrome setTimeout(() => { window.scrollTo({ top: document.body.scrollHeight, behavior: "smooth" }); }, 0); }, [messages]);
return (17 collapsed lines
<main className="chat"> <header> <h1>Convex Chat</h1> <p> Connected as <strong>{NAME}</strong> </p> </header> {messages?.map((message) => ( <article key={message._id} className={message.user === NAME ? "message-mine" : ""} > <div>{message.user}</div>
<p>{message.body}</p> </article> ))} <form onSubmit={async (e) => { e.preventDefault(); await sendMessage({ user: NAME, body: newMessageText, }); setNewMessageText(""); }} >12 collapsed lines
<input value={newMessageText} onChange={async (e) => { const text = e.target.value; setNewMessageText(text); }} placeholder="Write a message…" autoFocus /> <button type="submit" disabled={!newMessageText}> Send </button> </form> </main> );}
10 collapsed lines
function getOrSetFakeName() { const NAME_KEY = "tutorial_name"; const name = sessionStorage.getItem(NAME_KEY); if (!name) { const newName = faker.person.firstName(); sessionStorage.setItem(NAME_KEY, newName); return newName; } return name;}At this point you might see a blank screen. This is because we need to add the following to the .env.local file. Note: this is my full file without the admin key value shown.
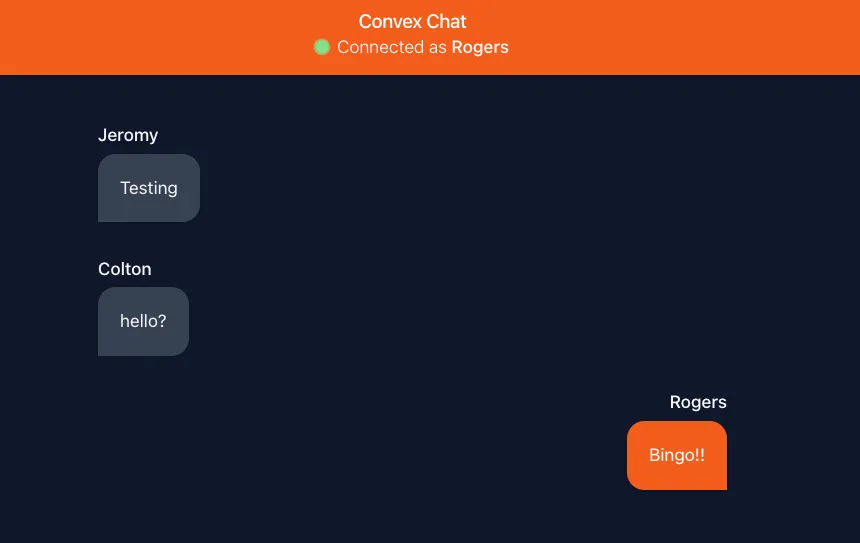
VITE_CONVEX_URL=http://127.0.0.1:3210CONVEX_SELF_HOSTED_URL='http://127.0.0.1:3210'CONVEX_SELF_HOSTED_ADMIN_KEY='' # This is the key you generated earlier to login to the dashboardFor some reason the SST dev environment must be restarted to pick up the .env.local file changes. However, once we restart we should see the chat interface again but no messages yet. Lets test it out by sending a message.
Deployed to AWS
Awesome! We now have a working Convex self-hosted instance running locally with SST using a MySQL database and S3 buckets. Next we will shift focus to deploying this all to AWS for real!
Truths
It took some time to figure out how to get things deployed to AWS. And I have found some things that are not the best DX. However, I did manage to get it working. I will share my findings after we work through the deployment.
Custom Domain
From the Convex Self-Hosted Guide
Your Convex backend will be running on this server at port 3210, with HTTP actions exposed at port 3211, and the dashboard running on port 6791. Set up routing to forward requests from your domain to these ports. For example:
https://api.my-domain.comforwards tohttp://localhost:3210https://my-domain.comforwards tohttp://localhost:3211https://dashboard.my-domain.comforwards tohttp://localhost:6791
# URL of the Convex API as accessed by the client/frontend.CONVEX_CLOUD_ORIGIN='https://api.my-domain.com'
# URL of Convex HTTP actions as accessed by the client/frontend.CONVEX_SITE_ORIGIN='https://my-domain.com'
# URL of the Convex API as accessed by the dashboard (browser).NEXT_PUBLIC_DEPLOYMENT_URL='https://api.my-domain.com'I tried my best to make the above work with my custom domain. However, I kept running into routing issues. I think I just had the wrong configuration. Therefore, I ended up mirroring the ports that the Convex backend uses for the Load Balancer rules.
// showing the new convex service setupconst convex = new sst.aws.Service("Convex", { cluster, image: "ghcr.io/get-convex/convex-backend:5143fec81f146ca67495c12c6b7a15c5802c37e2", cpu: "0.5 vCPU", memory: "1 GB", scaling: { min: 1, max: 1, }, link: [ database, exportsBucket, snapshotImportsBucket, modulesBucket, filesBucket, searchBucket, ], loadBalancer: { domain: { name: domain, aliases: [`api.${domain}`], dns: sst.aws.dns(), }, health: { "3210/http": { path: "/version", interval: "1 minute", timeout: "10 seconds", }, "3211/http": { path: "/version", interval: "1 minute", timeout: "10 seconds", }, }, rules: [ { listen: "3210/https", forward: "3210/http", }, { listen: "3211/https", forward: "3211/http", }, ], }, environment: { S3_STORAGE_EXPORTS_BUCKET: exportsBucket.name, S3_STORAGE_SNAPSHOT_IMPORTS_BUCKET: snapshotImportsBucket.name, S3_STORAGE_MODULES_BUCKET: modulesBucket.name, S3_STORAGE_FILES_BUCKET: filesBucket.name, S3_STORAGE_SEARCH_BUCKET: searchBucket.name, REDACT_LOGS_TO_CLIENT: "true", ...($dev ? { MYSQL_URL: $interpolate`mysql://${database.username}:${database.password}@host.docker.internal:${database.port}`, CONVEX_CLOUD_ORIGIN: "http://127.0.0.1:3210", CONVEX_SITE_ORIGIN: "http://127.0.0.1:3211", DO_NOT_REQUIRE_SSL: "true", DISABLE_BEACON: "true", } : { MYSQL_URL: $interpolate`mysql://${database.username}:${database.password}@${database.host}:${database.port}`, CONVEX_CLOUD_ORIGIN: $interpolate`https://${domain}:3210`, CONVEX_SITE_ORIGIN: $interpolate`https://${domain}:3211`, }), }, dev: { url: "http://127.0.0.1:3210", command: "bun run scripts/docker-backend.ts", }, transform: { service: { enableExecuteCommand: true, }, },});We also need to update the Dashboard service to use the new domain. We will use an API Gateway to handle the routing, as it is cheaper than a Load Balancer. Unfortunately, at this time SST does not have support to share the same Load Balancer between services. Maybe in the future.
const dashboard = new sst.aws.Service("Dashboard", { cluster, image: "ghcr.io/get-convex/convex-dashboard:5143fec81f146ca67495c12c6b7a15c5802c37e2", environment: { NEXT_PUBLIC_DEPLOYMENT_URL: $dev ? "http://127.0.0.1:3210" : $interpolate`https://${domain}:3210`, }, link: [convex], dev: { url: "http://127.0.0.1:6791", command: "bun run scripts/docker-dashboard.ts", }, serviceRegistry: { port: 6791, }, cpu: "0.25 vCPU", memory: "0.5 GB",});
if (!$dev) { const api = new sst.aws.ApiGatewayV2("Api", { vpc, domain: { name: `dashboard.${domain}`, dns: sst.aws.dns(), }, }); api.routePrivate("$default", dashboard.nodes.cloudmapService.arn);}Then the static site will need to be updated to use the new domain.
const site = new sst.aws.StaticSite("Site", { dev: { command: "bun run dev", url: "http://127.0.0.1:5173", }, build: { command: "bun run build", output: "./dist", }, environment: { VITE_CONVEX_URL: $dev ? "http://127.0.0.1:3210" : $interpolate`https://${domain}:3210`, }, domain: { name: `static.${domain}`, dns: sst.aws.dns(), },});Before you deploy
Before you deploy, let me tell you about what happened when I deployed at this stage. I learned that the AWS_ACCESS_KEY_ID and AWS_SECRET_ACCESS_KEY are not injected into the service task, and therefore even though I set the link to include the buckets, Convex’s backend assumed that because the AWS_ACCESS_KEY_ID and AWS_SECRET_ACCESS_KEY were not set, it would default back to local storage. Therefore, I had to create a new IAM user and policy to match the permissions it needed, and create a new access key for it. We will use the same permissions as SST sets for linking the buckets.
Also before we get any further, I also noticed that the connection to the database was not working. It was due to the fact SSL was required. For this blog post I did not want to get into figuring out how to download the CA certificate and add it to the docker container. Therefore, I just set the DO_NOT_REQUIRE_SSL environment variable to true. This is fine for local and this guide but you should likely download the CA certificate and add it to the docker container. I just figured as the connection was inside the VPC, it would be fine.
Here is the final Convex service setup. With the IAM user and policy.
const convexUser = new aws.iam.User("ConvexUser");const convexUserPolicy = new aws.iam.UserPolicy("ConvexUserPolicy", { user: convexUser.name, policy: { Version: "2012-10-17", Statement: [ { Sid: "ExportsBucketAccess", Effect: "Allow", Action: ["s3:*"], Resource: [exportsBucket.arn, $interpolate`${exportsBucket.arn}/*`], }, { Sid: "SnapshotImportsBucketAccess", Effect: "Allow", Action: ["s3:*"], Resource: [ snapshotImportsBucket.arn, $interpolate`${snapshotImportsBucket.arn}/*`, ], }, { Sid: "ModulesBucketAccess", Effect: "Allow", Action: ["s3:*"], Resource: [modulesBucket.arn, $interpolate`${modulesBucket.arn}/*`], }, { Sid: "FilesBucketAccess", Effect: "Allow", Action: ["s3:*"], Resource: [filesBucket.arn, $interpolate`${filesBucket.arn}/*`], }, { Sid: "SearchBucketAccess", Effect: "Allow", Action: ["s3:*"], Resource: [searchBucket.arn, $interpolate`${searchBucket.arn}/*`], }, ], },});const convexUserAccessKey = new aws.iam.AccessKey("ConvexUserAccessKey", { user: convexUser.name,});
const convex = new sst.aws.Service("Convex", { cluster, image: "ghcr.io/get-convex/convex-backend:5143fec81f146ca67495c12c6b7a15c5802c37e2", cpu: "0.5 vCPU", memory: "1 GB", scaling: { min: 1, max: 1, }, link: [ database, exportsBucket, snapshotImportsBucket, modulesBucket, filesBucket, searchBucket, ], loadBalancer: { domain: { name: domain, aliases: [`api.${domain}`], dns: sst.aws.dns(), }, health: { "3210/http": { path: "/version", interval: "1 minute", timeout: "10 seconds", }, "3211/http": { path: "/version", interval: "1 minute", timeout: "10 seconds", }, }, rules: [ { listen: "3210/https", forward: "3210/http", }, { listen: "3211/https", forward: "3211/http", }, ], }, environment: { S3_STORAGE_EXPORTS_BUCKET: exportsBucket.name, S3_STORAGE_SNAPSHOT_IMPORTS_BUCKET: snapshotImportsBucket.name, S3_STORAGE_MODULES_BUCKET: modulesBucket.name, S3_STORAGE_FILES_BUCKET: filesBucket.name, S3_STORAGE_SEARCH_BUCKET: searchBucket.name, REDACT_LOGS_TO_CLIENT: "true", ...($dev ? { MYSQL_URL: $interpolate`mysql://${database.username}:${database.password}@host.docker.internal:${database.port}`, CONVEX_CLOUD_ORIGIN: "http://127.0.0.1:3210", CONVEX_SITE_ORIGIN: "http://127.0.0.1:3211", DO_NOT_REQUIRE_SSL: "true", DISABLE_BEACON: "true", } : { MYSQL_URL: $interpolate`mysql://${database.username}:${database.password}@${database.host}:${database.port}`, CONVEX_CLOUD_ORIGIN: $interpolate`https://${domain}:3210`, CONVEX_SITE_ORIGIN: $interpolate`https://${domain}:3211`, DO_NOT_REQUIRE_SSL: "true", AWS_ACCESS_KEY_ID: convexUserAccessKey.id, AWS_SECRET_ACCESS_KEY: convexUserAccessKey.secret, }), }, dev: { url: "http://127.0.0.1:3210", command: "bun run scripts/docker-backend.ts", }, transform: { service: { enableExecuteCommand: true, }, },});Deploying
Now when we deploy, we should set everything running and connected. However, there is still the need to generate the Convex Admin API key which is required to login to the dashboard.
To do this we can use the AWS CLI to exec a command in the Convex service. You will notice that I set the transform.service.enableExecuteCommand to true to enable this. However, I did find that SST already does this for your in the service component. I left the transform in the code to call it out.
aws ecs execute-command --cluster cluster-name \ --task task-id \ --container container-name \ --interactive \ --command "/bin/sh"Therefore, we can go to the AWS console to find these values. Once you have the cluster-name task-id and container-name we can run the following command to generate the Convex Admin API key.
aws ecs execute-command --cluster convex-self-hosted-demo-234r3f \ --task 2123435524vfdg34325235 \ --container Convex \ --interactive \ --command "./generate_admin_key.sh" \ --profile someprofileNOTE: In order to run the command you must have the AWS CLI and the Session Manager plugin installed.
Now you should be able to go to the dashboard route you set and use the admin API key to login.
Conclusion
At this point, things should be working. 🤞. I know there were some rough edges for me, but we were able to get things working.
Be sure to run sst remove on any stages to clean up the resources. If left running, they will continue to cost you money!
Final notes
Generate Admin API key
One thing I noticed was that anytime the Convex service restarts, I would need to generate a new admin API key to login to the dashboard. I think that if I was to add an EBS volume to the Convex service this might solve the issue. However, for this guide I left out the EBS volume. Therefore, be prepared anytime the Convex service restarts, you will need to generate a new admin API key to login to the dashboard. Sorry about that.
Use EC2 Instead
If I would have taken the route of using an EC2 instance directly, and just using the Convex docker-compose.yml file, I likely would have been “better” off. However, I wanted to see if I could get it working using the SST components I know and love.
Horizontal Scaling
At this time, Convex Self Hosted does not support horizontal scaling by default. It does seems though that it maybe possible in the future. I also say in the Discord that it is likely not even needed for single projects. Convex Cloud does have horizontal scaling, but this is because they are supporting multiple projects and customers!
Database Name
The database name must be convex_self_hosted for the Convex service to work.
Previews and Different Environments
As we are self-hosting, we don’t have the luxury of using Preview environments. Therefore, please note that each stage you deploy to will have its own database. Convex does have export and import functionality, which you can use to manually move data between environments.
Images Hash Versions
The Convex images are using a hash for the version. These were current as of May 20, 2025. You should check the Convex Self-Hosted repo for the latest version.
Complete Code
The code I used for this can be found here.